 Information

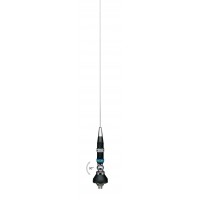
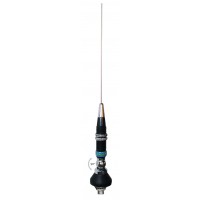
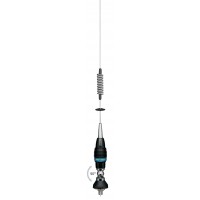
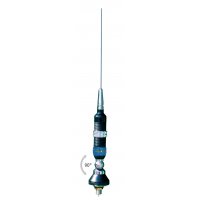
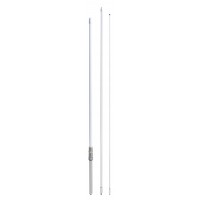
CB antenna
Improve your range and communication quality with the CB antenna guide from President Electronics.
The antenna is one of the essential elements of a transceiver. The right choice and neat installation will be the key to the flawless operation of your CB radio set. The quality of the antenna is an important factor for the efficiency of your transmission and reception, it is essential to choose a quality antenna to get the best performance of your communication. In general for CB radios, the longer the antenna, the better its results.
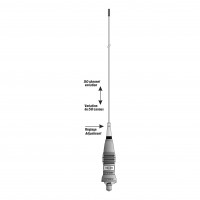
The antenna ensures a transformation between two forms of energy. In transmission, it converts an electrical energy supplied by the transceiver into radiating electromagnetic energy, and reciprocally into reception. The ideal antenna for 27MHz should have a theoretical wavelength of 11 meters. Under these conditions, an elementary 1/4 wave dipole should measure 2.75 meters. To improve performance, the antenna is extended: 1/2, 5/8, or 7/8 wave. The use of a self (copper wire at the base) allows to produce models of different sizes, which are even more efficient.
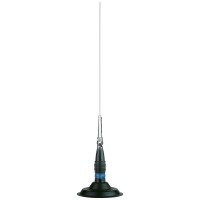
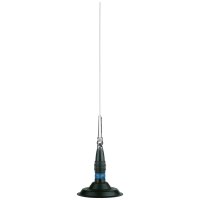
They are intended to be installed on vehicles, the metal body as a ground plane. They can be magnetic (instant installation and removal, theft failure, etc.), or fixed by drilling (long-term installation). The first mentioned require a verification, or possibly an adjustment of the SWR after each repositioning, which is not the case for the fixed antennas by drilling. Must be fixed to the vehicle where there is a maximum of metal surface (ground plane), away from windscreen mountings. If you already have a radio-telephone antenna installed, the CB antenna should be higher than this.

Fixed antennas are mainly intended to be installed on the roof of a building. These are sometimes equipped with radiants acting as a ground plane. Make sure it is installed in as clear space as possible. If it is fixed to a mast, it may be necessary to install guy-wires, according to the laws in force (you should seek professional advice). For an antenna which must be fixed by drilling, you will need a good contact between the antenna and the ground plane. To obtain this, you should slightly scratch the surface where the screw and tightening star are to be placed. Be careful not to pinch or flatten the coaxial cable (as this runs the risk of break down and/or short-circuiting).
A pre-adjusted antenna is one that has been already set for optimal use on Citizen's Band frequencies. This prevents users from making any adjustments in order to get good transmission and reception on Citizen's Band frequencies.
Pre-adjusted antennas are usually easier to install and to use than antennas that require manual adjustment. They are also more reliable because they have been designed and tested for optimal use on the Citizen's Band. Pre-adjusted antennas are preferably used with a good ground plane (e.g. car roof or lid of the boot).
An adjustable antenna can be adjusted for optimal use on Citizen's Band frequencies.
Adjustable antennas often offer better performance the pre-adjusted. They are often used for long distance communications, as they can be adjusted to maximize transmission and reception performance on the different frequencies used for these communications. Adjustable antennas offer a much wider range of use and make it possible to take advantage of smaller ground planes.
For CB, the longer the antenna, the better its results. Your dealer or our sales department will be able to help you with your choice of antenna.
- It must be fixed to the vehicle where there is a maximum of metallic surface (ground plane), away from windshield mountings and rear window.
- If you already have a radio-telephone antenna installed, the CB antenna should be higher than this.
- There are 2 types of antennas: pre-adjusted and adjustable.
- Pre-adjusted antennas should be used on a good ground plane (e.g. car roof or lid of the boot).
- Adjustable antennas offer a much larger range and can be used on a smaller ground plane (see SWR Setting).
- For an antenna which must be fixed by drilling, you will need a good contact between the antenna and the ground plane. To obtain this, you should slightly scratch the surface where the screw and tightening star are to be placed.
- Be careful not to pinch or flatten the coaxial cable (as this runs the risk of break down and/or short-circuiting).
- Connect the antenna.
- A fixed antenna should be installed in as clear space as possible. If it is fixed to a mast, it will perhaps be necessary to guy it in accordance the standards in force (you should seek professional advice). All PRESIDENT antennas and accessories are designed to give maximum efficiency to each CB radio within the range.
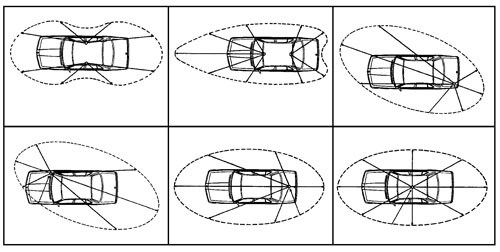
Output Radius Pattern
All PRESIDENT's antennas are delivered with a factory-preset. However, the environment and the location chosen for the installation are all factors likely to vary the SWR (Standing Wave Ratio). It is therefore very important to check that your antenna is perfectly tuned before using your CB radio. Emitting with an unadjusted antenna, a damaged antenna's cable or a disconnected antenna can cause significant damage to your transceiver.
Its setting, to be carried out precisely, improves the performance of your installation and prevents you from damaging your device (damage caused by un inadapted SWR is not covered by the warranty). This operation must be carried out when changing the antenna. This adjustment must be made in an obstacle-free area.
New, easy and very handy setting of the SWR by beeping.
Some of our models are equipped with the automatic SWR function. The measurement of the SWR is done on the channel and the active band.
To activate this function:
- Go to the menu and select SWR.
- The position automatically switches to TX mode without pressing the PTT key and the measurement begins.
The measurement time is 5 minutes maximum. A countdown is made in the display. - Adjust the antenna.
- The beep* is continuous when the SWR value is 1.0. The space between the beeps becomes increasingly larger as the value of the SWR is 1.0.
- The volume of the beep is adjustable with the VOL button.
- The display shows the SWR value, for example 2.5.
- Press the PTT switch to exit FUNCTIONS mode.
*Check that the beep volume is set to a suitable level.
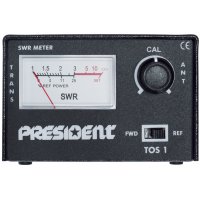
Connecting SWR-meter
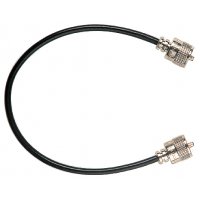
Connect the SWR-meter (TOS-1) PRESIDENT between the CB radio and the antenna as close as possible to the CB (use a maximum of 35 cm cable, type PRESIDENT CA-2C).
Control procedure
- Check all connections.
- Set the CB on channel 20.
- Put the switch on the SWR-meter to position FWD (calibration).
- Press the PTT ''push-to-talk'' switch on the microphone to transmit.
- Bring the index needle to the index finger
 , ◆ or SET by using the calibration key.
 - Change the switch to position REF (reading of the SWR level).The reading on the Meter should be as near as possible to 1. If this is not the case, readjust your antenna to obtain a reading as close as possible to 1. (A SWR reading between 1 and 1.5 is acceptable).
- In rare cases, you may need to to shorten the radiant of your antenna by a few millimeters, in order to obtain the correct value.
- It will be necessary to recalibrate the SWR-meter after each adjustment of the antenna.
Our Networks